Showing posts with label Crafts. Show all posts

Dec 13, 2015

Christmas Teacher Gift - Tea & Jam Plate


We were at a Christmas craft show in November and got this idea for a gift & we ran with it and made it out own. It was easy and fun to buy all the stuff to make it.

Here's what's in the gift:
Small dessert Plate
Small Jar of Jam/Jelly
Chocolate
Tea Bag
Spreader

Make it!! 
Small dessert plate. This time of year you can buy cute Christmas plates everywhere & usually in packs of 4 or more. We found these at Homegoods.

Next we add items of your choice on the plate ....we chose a small jar of gourmet Jam or Jelly, a chocolate, a tea bag & a cute holiday themed spreader. Tea & Jam plate!!

How cute is this? You could add anything on this plate really ...just use your imagination! Include a gift card too for a really nice gift!

Now, just wrap in clear wrapping paper with a cute Christmas design, tie it up with pretty ribbon and tie on a cute gift tag!

Voila .... You are DONE!! The teachers will most likely think this is cute & unique.

I had to make 6 of them ...BOO! But they turned out soooo cute!


Dec 11, 2015

The Adventures of our ELF ON THE SHELF


If you've come to this blog post, I will guess you are a parent that has an Elf on the Shelf. Congratulations, Mom & Dad - you have to remember to move your elf every single night for the next 24 nights (if you start on December 1st, that is!) It can be a hassle - right? But - its mostly fun for you and your children. Make the MOST OF IT!

Like you, we scour Pinterest for ideas for our Elf and come up with some of our own on the fly. 

My Elf is not overly mischievous. Our Elf is more cute and kind - we keep it simple. Our Elf also brings small gifts whenever my child has been really good the day before. It give my little one something to look forward to. 

REMEMBER THESE IMPORTANT THINGS ABOUT YOUR ELF ON THE SHELF: 

  • Your child won't be this little for long, so enjoy the Elf as much as they do! The magic of Christmas lives strong in your child's heart. 
  • It's only for one month a year (actually less than a month) that you have to move the Elf around. One day your child won't believe anymore and you will actually MISS this. 
  • Make it fun for you and your child ... there are so many ideas out there that are simple and enjoyable. 
  • We advise to stay away from the "naughty" Elf activities that you may see on Pinterest. There are some REALLY bad ones on Pinterest that are FUNNY, but also DISTURBING! 

Here are some of our ELF Adventures..... we will add more as the season continues...

The First night that our Elf came - she brought an ADVENT calendar !


Our Elf got into the Reese's Pieces!


Our Elf likes to ride the Rocking Horse at night!


 Our Elf leaves little gifts - like these window clings for my little one to decorate! 


We hope that we've given you some ideas......More Elf adventures to come!!! 


Oct 30, 2015

Autumn Home Tour (Part 2)


One of the reasons Amanda and I get along so well, like sisters really, is that we share common interests and our love for Fall is a big one! We love to decorate, eat (of course) and visit all of the beautiful places in Virginia during the season. So, decorating our homes is par for the course! So, I continue the Autumn Home Tour with some pics from my house during this colorful and exciting season. 


One of my favorite parts of my new house. My pretty fireplace. 


In true Suburban Epicurean form, a Fall cookbook 


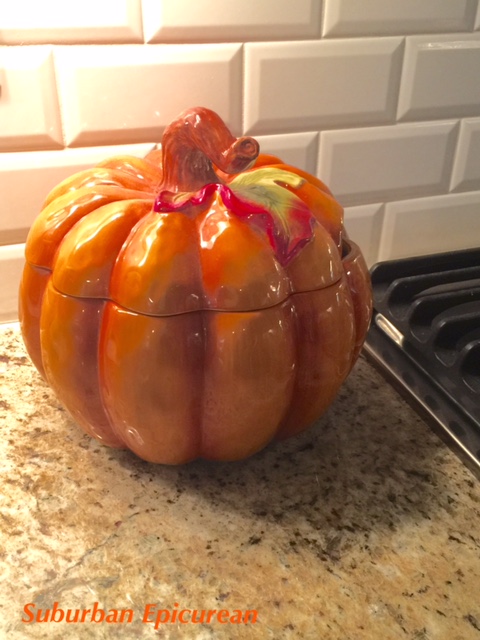
My favorite pumpkin soup tureen stays on the counter September until Thanksgiving


My favorite thing in the world is pillows. I have so many pillows it is a joke at my house, and quite honestly may be an addiction! I love this pumpkin and gourd lumbar from Pottery Barn. 


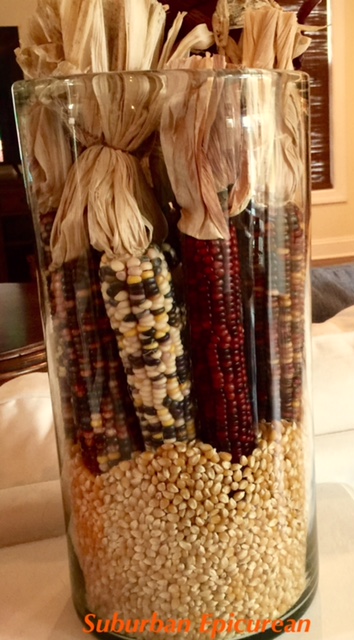
I love the look of Indian Corn, it is so colorful and is really indicative of the season. It looks great in a vase, in a bowl or even a cornucopia. 


This is my dining room table. Mixing up my everyday decorations like the basket with some autumn  touches is always fun. 


Another one of my loves....PUMPKINS, I am particularly into white pumpkins lately. 


Again with the pillows, I told you. 


Dec 10, 2014

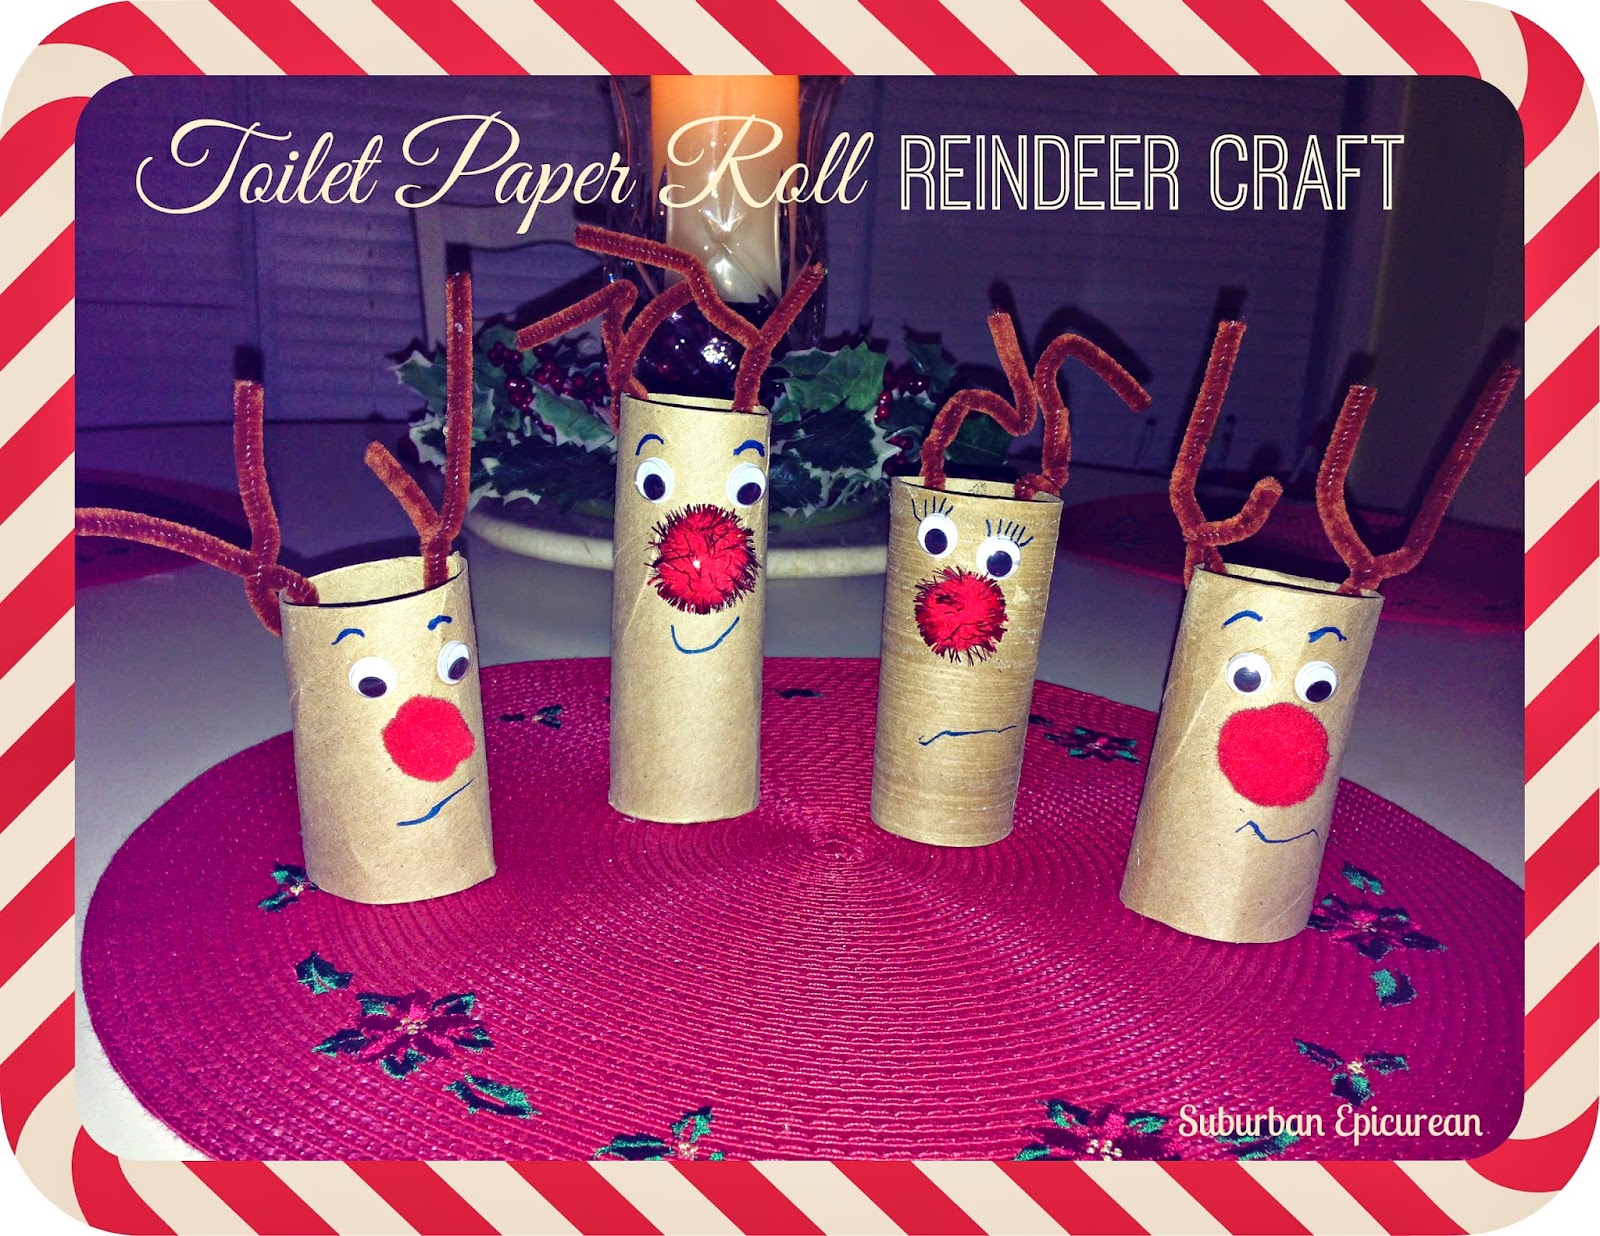
Toilet Paper Roll REINDEER Craft


Find it on Pinterest


This craft is pretty easy and self explanatory, if you are crafty person. This is a great craft to do with toddlers and early elementary ages. 

The craft took about 5-10 minutes and my child ADORES it! 

What You Will Need: 
Empty Toilet Paper rolls or Paper Towel Rolls cut into 3
Brown Cleaners
Red Fuzzy Balls for the noses
Glue on Wiggly Eyes 
Black Marker
Glue (both regular school glue and/or Hot Glue Gun for adults to use only!)

Directions: 
Once you have your empty toilet paper rolls or cut up empty paper towel rolls ready to go - cut 2 small holes in the tops and push the pipe cleaners through and then bend them and tie them. 

Glue on the Eyes and the Nose (the eyes stay on with regular school glue, but the fuzzy balls for the nose may require a more adhesive glue). 
I used a glue gun for the nose and of course, I did that for little one - NEVER let a small child use a hot glue gun!

Let your child draw on a mouth, eyebrows or eyelashes!

Have fun with it and be creative with your child. 

Crafting with children is one of the most enjoyable things a parent can do.

ENJOY!


Apr 18, 2014

Easter Peeps Project


In case you haven't noticed.... we LOVE PINTEREST! I found this adorable craft and couldn't resist. 

So, we are sharing our Easter craft that is easy for kids to make for their friends and how cute it is! I took these to my daughter's daycare and enjoyed making them. Kids could even help with them and have fun. 

INSTRUCTIONS: 

(1) Box of Snack Size Ziplock Bags
(1) pack of Heavier Paper like Resume Paper
As many boxes as you need of Peeps!
1 Stapler

Fill Each snack sized bag with your desired amount of PEEPS! The snack size bags hold 3-4 perfectly! Print the ADORABLE labels found from Spoonful . Cut and fold in half, then staple on to the peeps bags.

It's that easy! 


Mar 31, 2014

DIY Diaper Cream


Find it On Pinterest

My toddler has suffered off and on for over a year with a recurrent yeast infection diaper rash. These rashes are pesky and just won't go away. We've tried everything from oatmeal baths to baking soda baths, prescription creams, special order creams, diet changes, you name it! I decided to look into the organic/homemade route and I went to none other than... Pinterest! 

So, as mentioned - I ran across this recipe on Pinterest and thought I would give it a try because it looked legit and I have heard nothing but good things about all of these ingredients (coconut oil, essential oils and beeswax). 

Truth be told here , I have never been what some may refer to as a "granola" type. I have always been far from it, but my interest has started to peek over the past year into the whole organic, natural way of life. I want to try to go chemical free and natural when I can (I think we can all agree that there are too many chemicals in all of our products today)... so this recipe is my guinea pig here. 

I have never used essential oils (I have recently been introduced to doTERRA oils, which are supposedly the best therapeutic grade essential oils that you can get. You have to order doTERRA from a direct dealer - FYI: not available in stores) 

UPDATE: Believe it or not - this cream CLEARED up my daughter's yeast infection diaper rash in about 2 days and has kept it away. Whenever it started to come back, I would apply some of this and the rash would be gone! I was shocked. I even told my pediatrician about it and she asked for the recipe to pass along to other patients. 

Ingredients: 

1 Cup Pure, Unrefined, Cold Pressed Coconut Oil
1/2 oz Beeswax
10 drops of Lavendar Essential Oil
10 drops of Melaleuca (or Tea Tree) Essential Oil
1 Clean Glass Canister or Mason Jar to put the Diaper Cream in

Directions (ramblings): 

If you've never used Coconut Oil before (get the kind you cook with, not the fractionated oil) - the consistency is like that of butter or shortening. Oh and BONUS: You can get a HUGE can of this at Costco for the same price as a little one at a heatlh food store (Suburban Epicurean saving you money! $$$) 

You will scoop out 1 cup and place in a boiling pot of water that has a glass bowl in it (this serves as a double boiler). Once the water is boiling, place on medium/low heat. 

Next place your beeswax in. The beeswax takes a significant amount of time to melt - this melting process took about 20 minutes. Stir off and on the entire time. 

Sidenote: I bought my beeswax at a local Natural Mercantile store. I recommend looking for beeswax at your local health food store or a local farmers market. 

See how the beeswax looks like chunks of butter?


Once this mixture is completely melted, remove from heat and place the glass bowl (use your oven mits!) on a trivet on the counter and let it cool until almost hardened (this took about another 20 minutes). 

While the mixture is slightly soft and still warm, you will want to mix in your essential oils before it hardens. I used a rubber spatula to mix. 

Once mixed well, transfer immediately into your storage container and there you have it. (Again, I used a rubber spatula to scrape the sides of the bowl and put the cream into the container).


This also serves as a wonderful hand lotion or even lip balm! 

I realize that the above pic looks a little like mashed potatoes, but trust me, its a cream. I used it on my hands and my hands are now very silky and smooth! The cream will "harden up" in the container, so anytime I wanted to apply to my little one's bottom, I just pointed my hair dryer at the cream for a few seconds on hot and it made the cream soft enough to apply as a balm.


** CLEAN UP TIP - I will be completely honest - this is VERY MESSY if you don't clean it up right away. I suggest using a paper towel to wipe out the bowl and use a rubber spatula (as mentioned above) to mix the mixture. 


**** So grateful for the author of this diaper cream recipe as she is helping me and my little one. We are very happy to test out this PINTEREST project. This WONDERFUL PINSPIRATION comes from: All Things Mama


Feb 13, 2013

Lucky Duck Valentine for Kids

So I know this is a FOOD blog, but occasionally, we will share with you some ideas we have for crafts, for the home, etc.

I made these ADORABLE Valentines for my daughter's daycare class tonight and I wanted to share with you because it is JUST too cute!!

                 I got these adorable miniature Valentine rubber duckies from Oriental Trading Company and they came in a bag of 12, which was perfect for gifting! She LOVES rubber duckies and so I thought other kids her age might too!


So, I put one little rubber duck in each little Valentine Bag, cut out little paper hearts and wrote a  note on each one ....


Here you can see the note close up....


I just thought that these were cute and I had to share with you all. 

~ ENJOY & HAPPY VALENTINES DAY! ~